
3D Printers at the Deschutes Public Library#
The pupose of this guide is to explore the basic features of the 3D printing, the core elements of the workflow when using 3D printers, and the tools that are available for creating and printing objects. This is by no means a complete guide but is intended to provide enough information to safely begin your 3D printing journey at one of the DPL Makespaces.
DPL Makerspaces: Central (in Bend) and Redmond#
Lets start by making sure that you know how to find the Makerspace page on the DPL website. At this time you can access the Makerspace page via the Services tab as shown below.
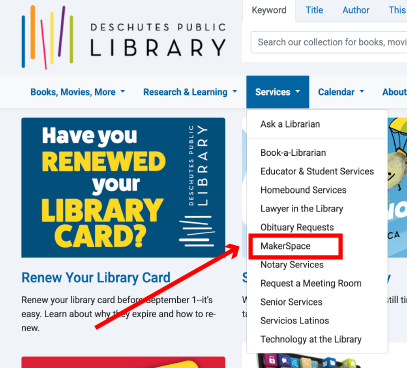
Fig. 1 DPL Dropdown Menu#
Scrolling down you will find the listing for the Makerspace hours. This gives you a sense for when you can access all the general resources of the Makerspace as well as when you will be able to reserve the use of a 3D printer. This is relevant in the context of the 3D printers since whatever projects you wish to work on will need to be completed during the Makerspace hours.
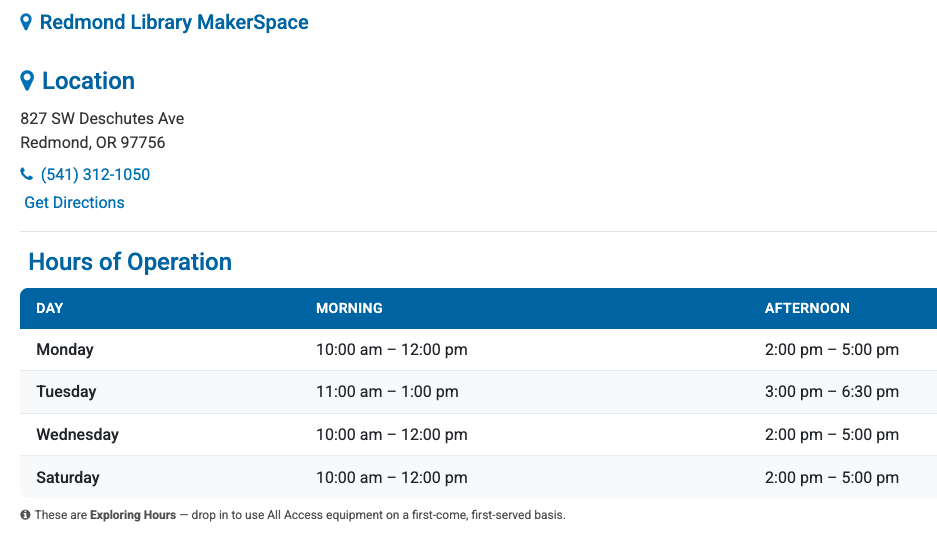
Fig. 2 DPL Makerspace Hours (Redmond)#
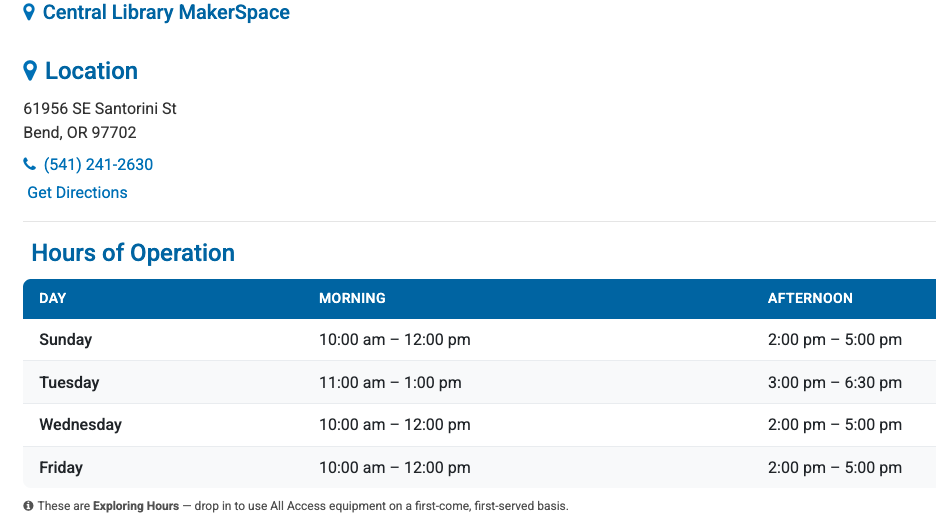
Fig. 3 DPL Makerspace Hours (Central)#
Scrolling further down there is a section for Reservable Equipment and Training. The equipment that is reservable also requires training to ensure safety and basic knowledge. You can schedule a Training Appointment on the website. You will need your library card to book the appointment and the training is only applicable to the card holder.
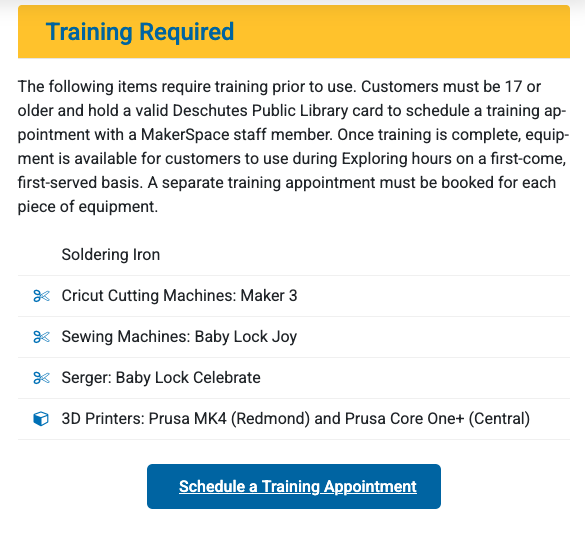
Fig. 4 Makerspace Equipment Training#
Just below the training section are various resources for 3D printing as well as links to reserve a printer.
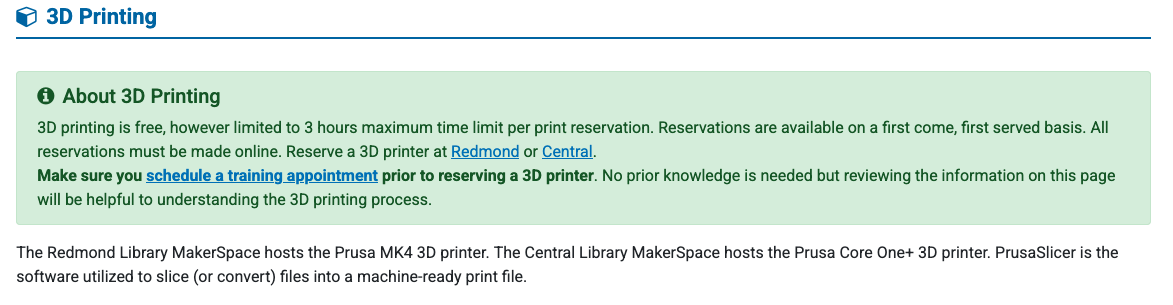
Fig. 5 Makerspace Equipment Reserve#
Note about 3D printer reservation:#
The reservation link takes you to the room reservation tool.
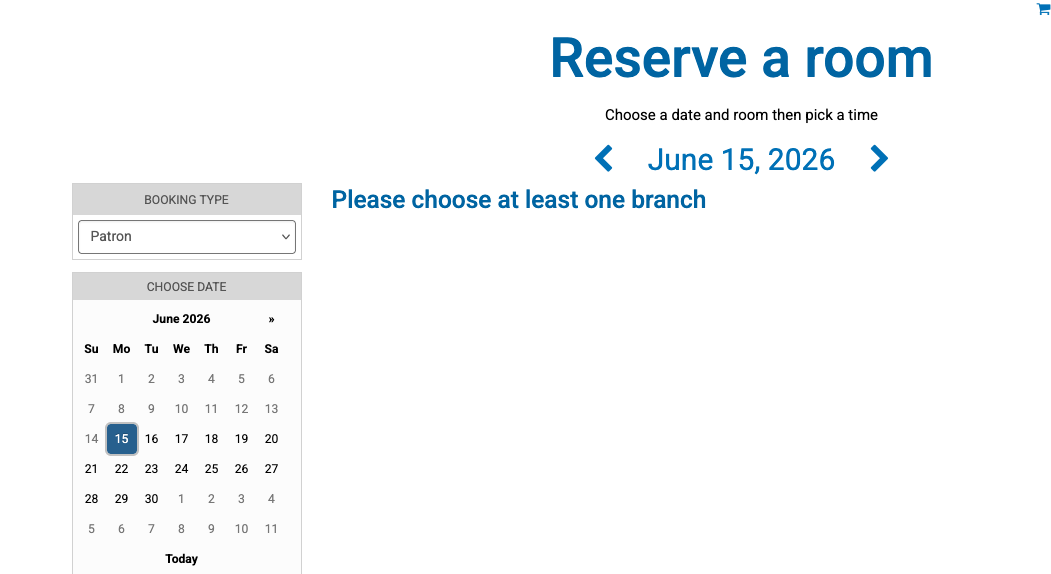
Fig. 6 DPL Room Reservations#
In the Branch menu are the current makerspaces. Select one or both.
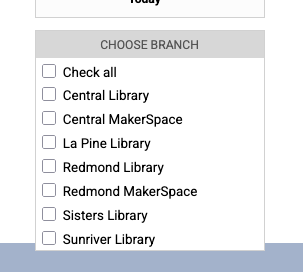
Fig. 7 DPL Room Reservations: Branch Select#
Now the room reservation tool will allow you to book any available times for the 3D printer. If no 3D printer is shown it may be due to staffing constraints or other considerations. Check other days. Be aware that the library is still developing best practices for the use of the Makerspace and the reservation system so details of this process may change.
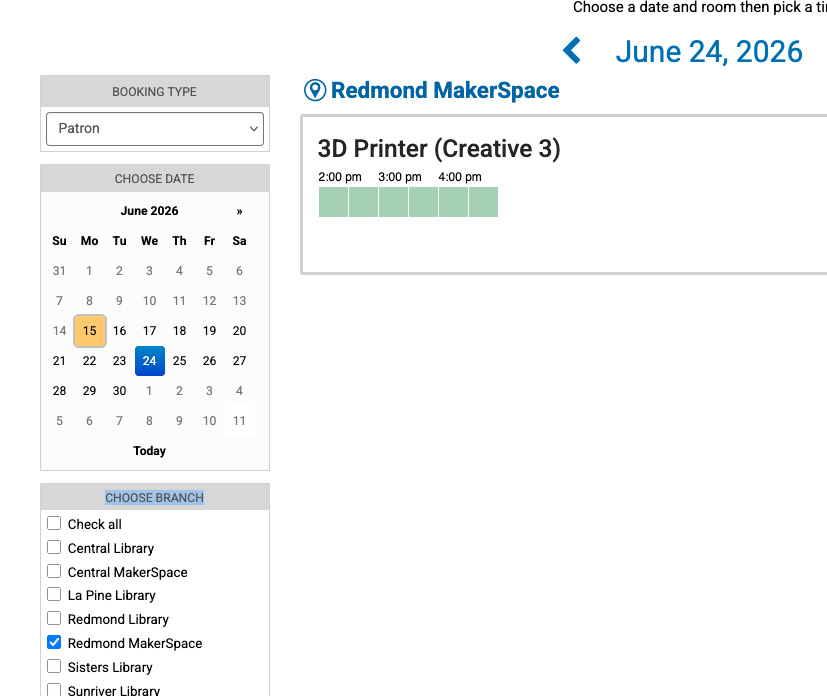
Fig. 8 3D Printer Reservation#
High Altitude View#
Working with 3D printers is a learning process that never stops for a variety of reasons. For this presentation I want to give a clear sense of the basic processes and skills needed to get started. Once you have a very basic comfort with the process then your skills will grow as you try prints or techni that you hear about or read about on the interwebs. Be curious and you will be delighted to see your skills grow. Because it’s only 2 min long (plus the irritating ads) we’ll watch this video which is linked at the bottom of the DPL MakerSpace page.
With such a general goal for this presentation here is what we’re going to touch on.
A Short History
The Workflow
I: CAD Options
Ia: Downloading Printable Files
II: ‘Slicing’ the File
Our 3D Printers
III: Printing the .gcode
FAQ